No products in the cart.
Trending


Step and Repeat Backdrop
405.00$

Step and Repeat Backdrop
405.00$
Description
Elevate your event display with a step and repeat backdrop featuring custom graphics and a durable aluminum frame. The heavy-duty 1.625″ telescoping stand provides excellent stability. It creates a polished branded display for trade shows, corporate events, photo booths, media walls, press events, and special occasions.
Print your custom step and repeat backdrop on premium 9oz wrinkle-free dye-sublimation fabric. The vibrant full-color graphics deliver sharp images and a smooth, glare-free finish. The pillowcase-style graphic includes a zipper closure for a clean presentation. The adjustable frame supports multiple graphic sizes and requires no tools for setup.
The lightweight display packs into the included carry bag for easy transport and storage. Its durable construction makes it a practical choice for businesses, exhibitors, photographers, event planners, schools, and organizations.
File Setup
Artwork File Setup Requirements
- Accepted Formats: JPEG or single-page PDF
- Color Mode: CMYK only
- Resolution: 150 DPI (raster images)
- Maximum Upload Size: 300MB
- Submit artwork built to ordered size
- Do NOT include crop marks or bleeds
- Double-sided products require two separate files
- Convert fonts to outlines
- Convert Pantones/Spot Colors to CMYK
FAQ
Q1. Are these replacement graphics compatible with my existing Large Tube Back Drop stand?
Yes — these replacement graphics are specifically designed for the Large Tube Back Drop stand with 1.625″ diameter telescoping poles. They are engineered to fit the range of graphic sizes supported by the adjustable pole system. We recommend confirming your current graphic dimensions before ordering to ensure a perfect fit with your existing stand hardware.
Q2. Why is the 9oz wrinkle-free dye-sub material better than standard backdrop materials?
The 9oz wrinkle-free dye-sub fabric is specifically chosen for backdrop and step and repeat applications because it resists creasing and bunching that make lower quality backdrop materials look unprofessional in photos and on camera. Dye-sublimation printing infuses color directly into the fabric fibers rather than sitting on the surface, resulting in richer, more vibrant color reproduction that holds up beautifully under event lighting, camera flashes, and video recording conditions.
Q3. How do I attach the replacement graphic to my Large Tube Back Drop stand?
The replacement graphic is designed for fast, tool-free attachment to the Large Tube Back Drop stand pole system. Simply thread the graphic onto the horizontal and vertical telescoping poles through the pole pockets or attachment points, adjust the poles to the correct size for your graphic dimensions, and your display is ready. The entire process takes just a few minutes and requires no tools, clips, or additional hardware.
Q4. Can these replacement graphics be used for both step and repeat events and trade show displays?
Absolutely — the Step and Repeat Backdrop Stand graphics are incredibly versatile and work beautifully across a wide range of applications. They are popular for branded step and repeat photo walls at red carpet events, corporate galas, award ceremonies, and product launches, as well as trade show booth backdrops, exhibition displays, retail brand activations, and promotional event backgrounds where a large-format branded visual makes a powerful impression.
Q5. How do I care for and store my Step and Repeat Backdrop Stand replacement graphics?
After your event, detach the graphic from the pole system and fold it loosely or roll it to avoid sharp creases that can be difficult to remove from fabric. The 9oz dye-sub fabric is machine washable on a gentle cycle with cold water if needed — air dry or tumble dry on low heat to maintain the fabric’s wrinkle-free properties and print quality. Store the folded graphic in the free carry bag alongside your stand hardware to keep everything organized, protected, and ready for your next event.
Installation Guide
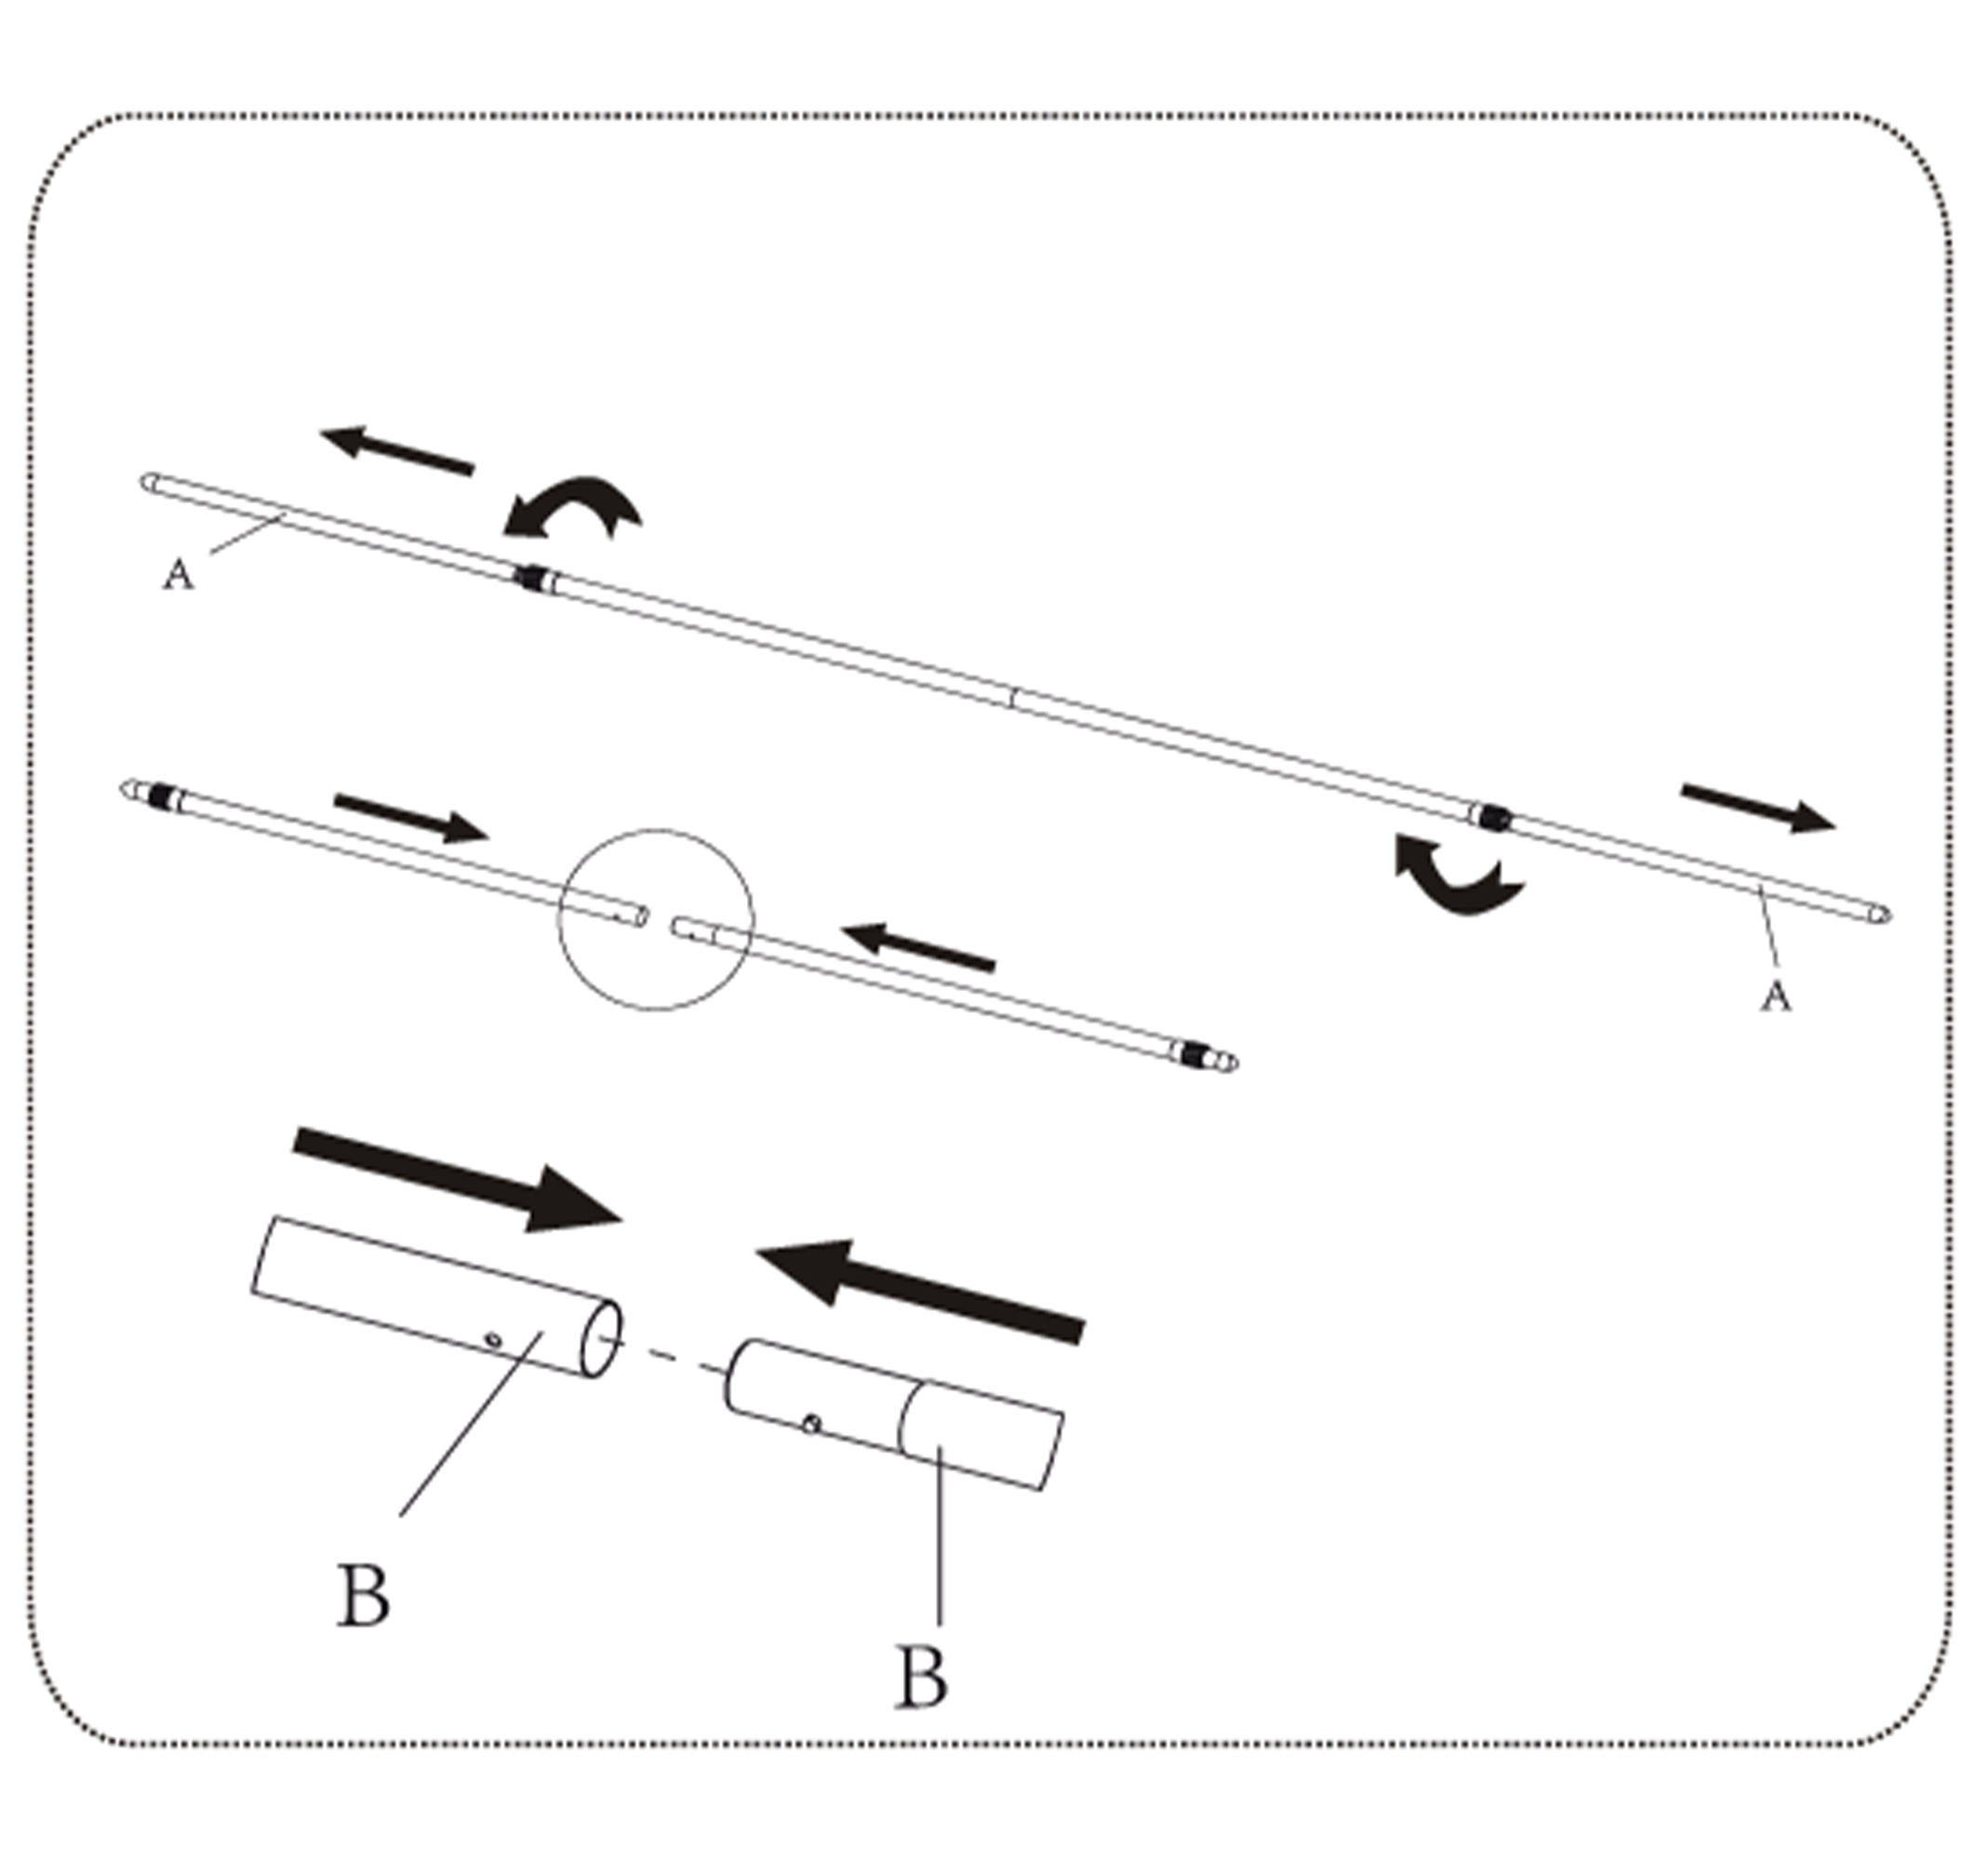
Step 1: Connect the two poles labeled #A-B by joining the B-B ends. Repeat with bottom poles #C-D. Extend telescopic ends A.
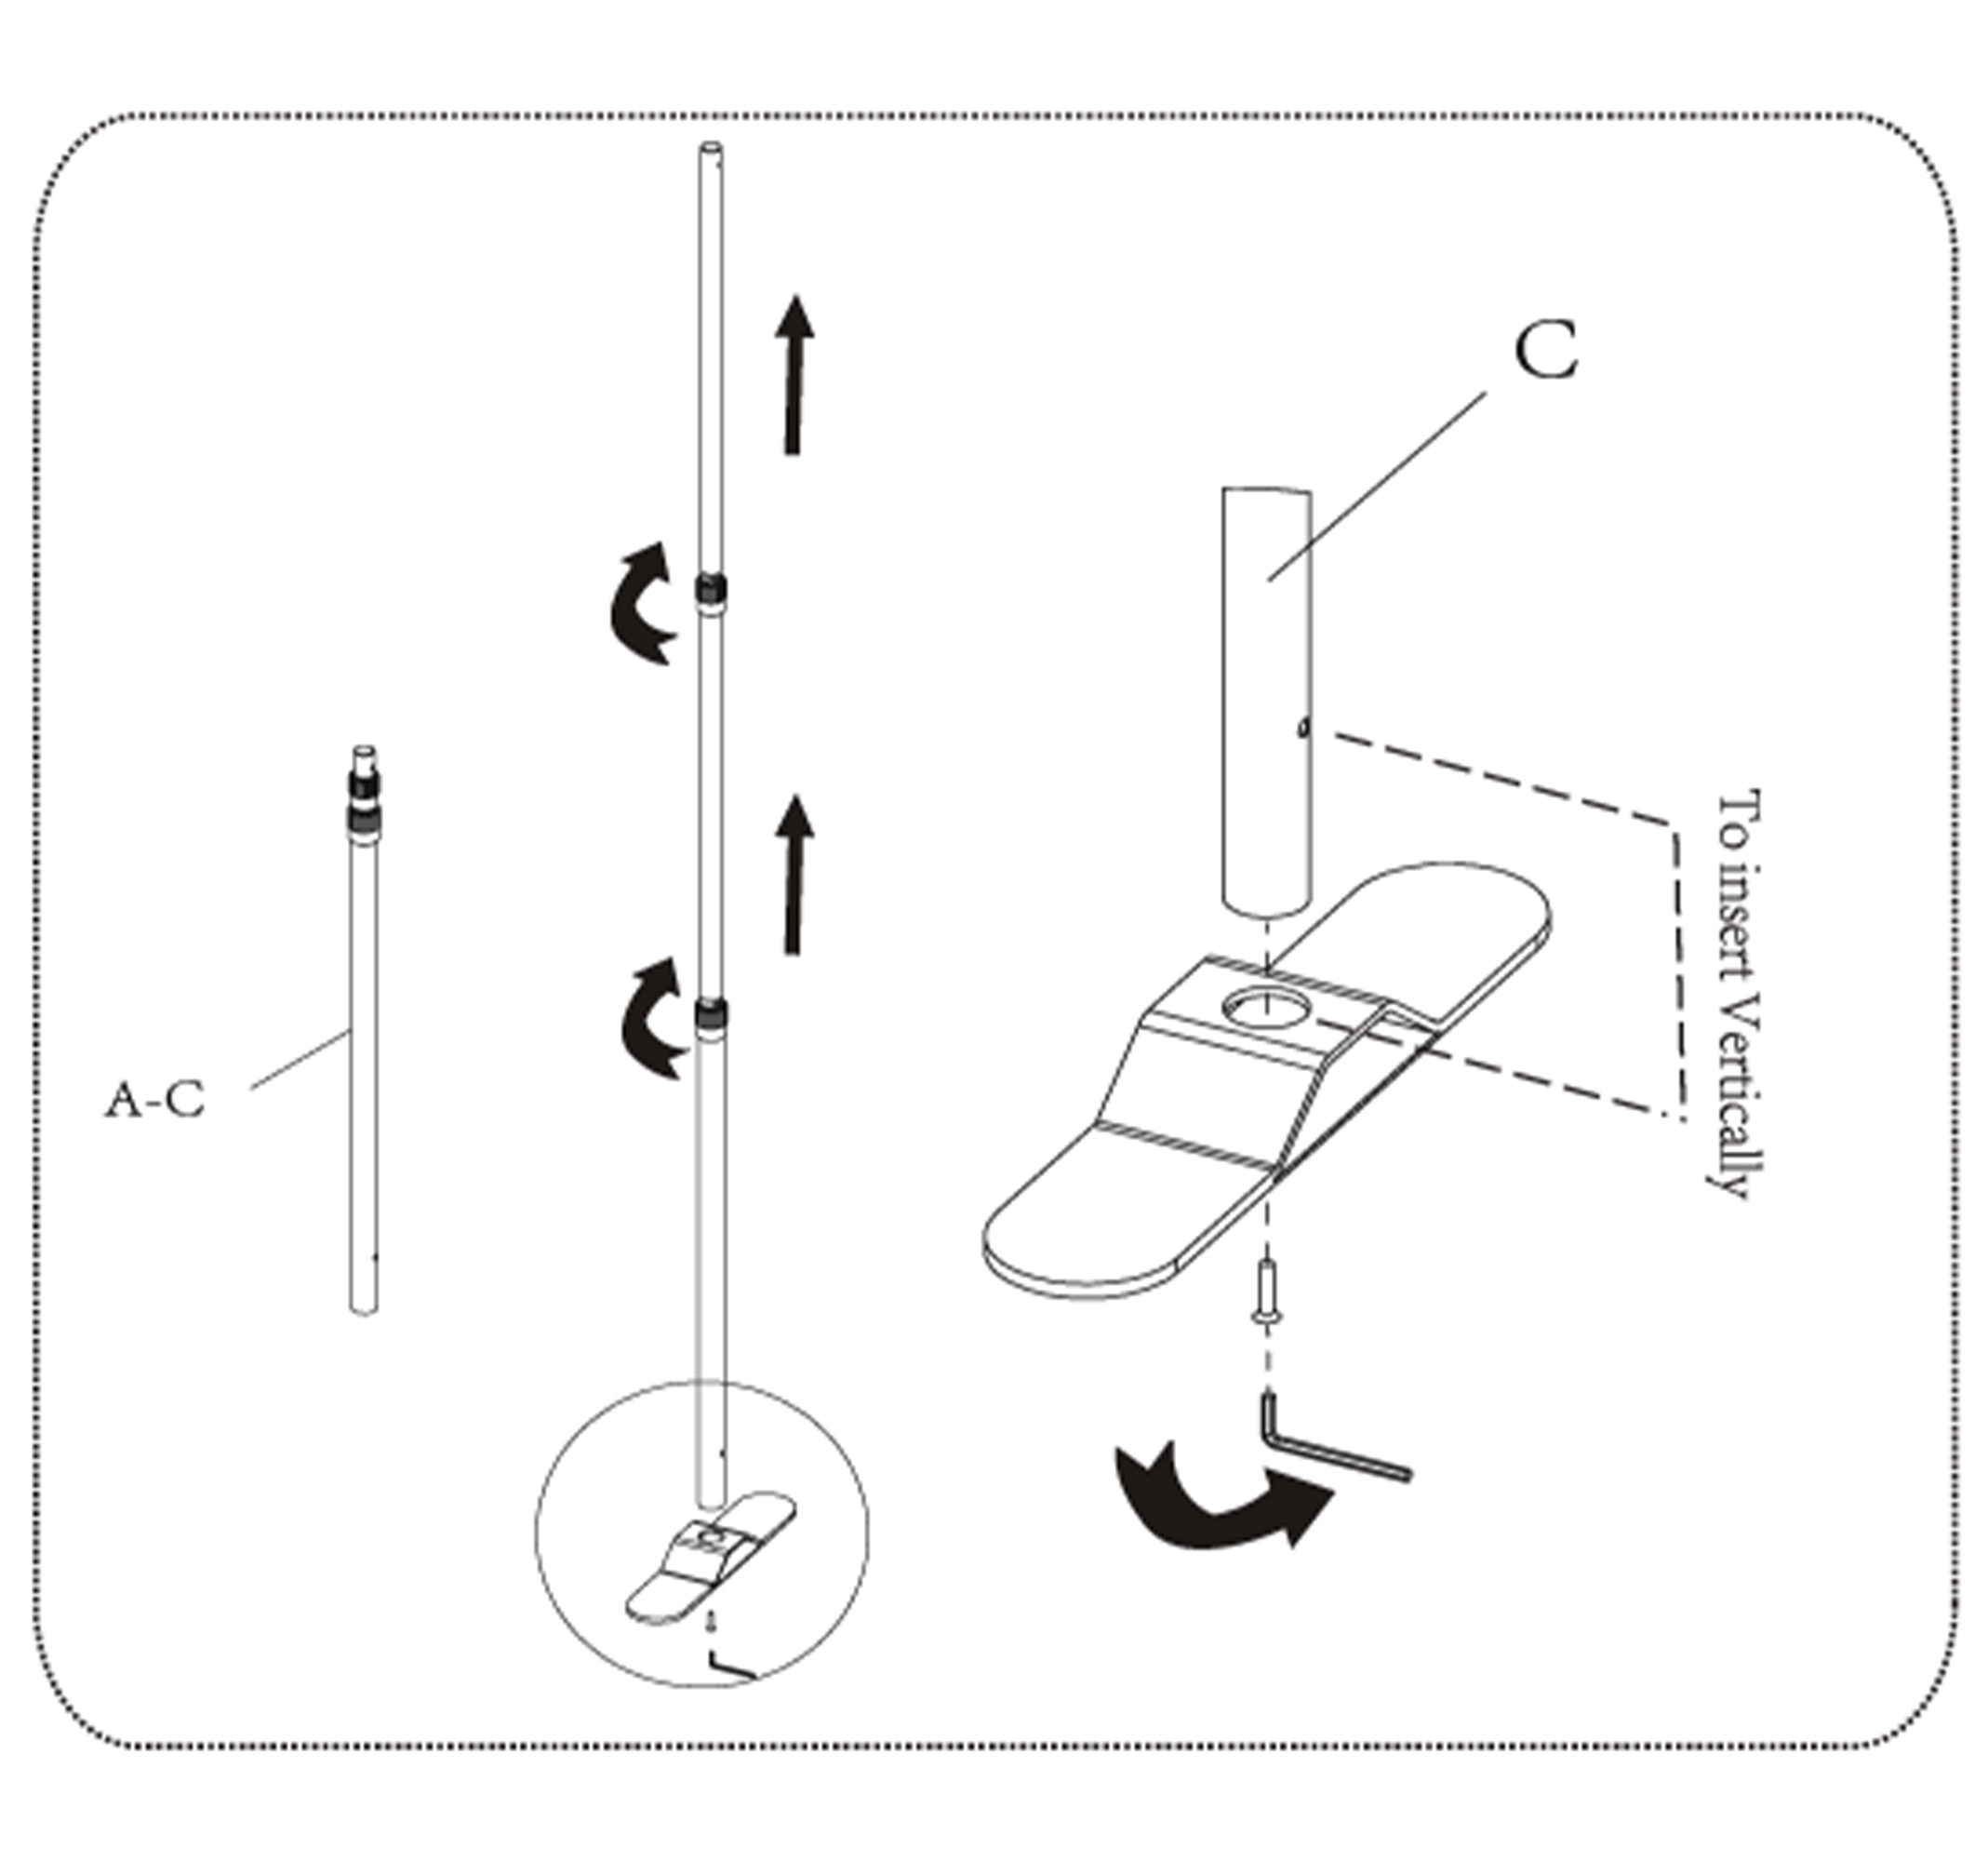
Step 2: Take vertical pole #A-C and insert end C into the pole socket in the base. From the bottom of the base thread hexbolt into end C and tighten.
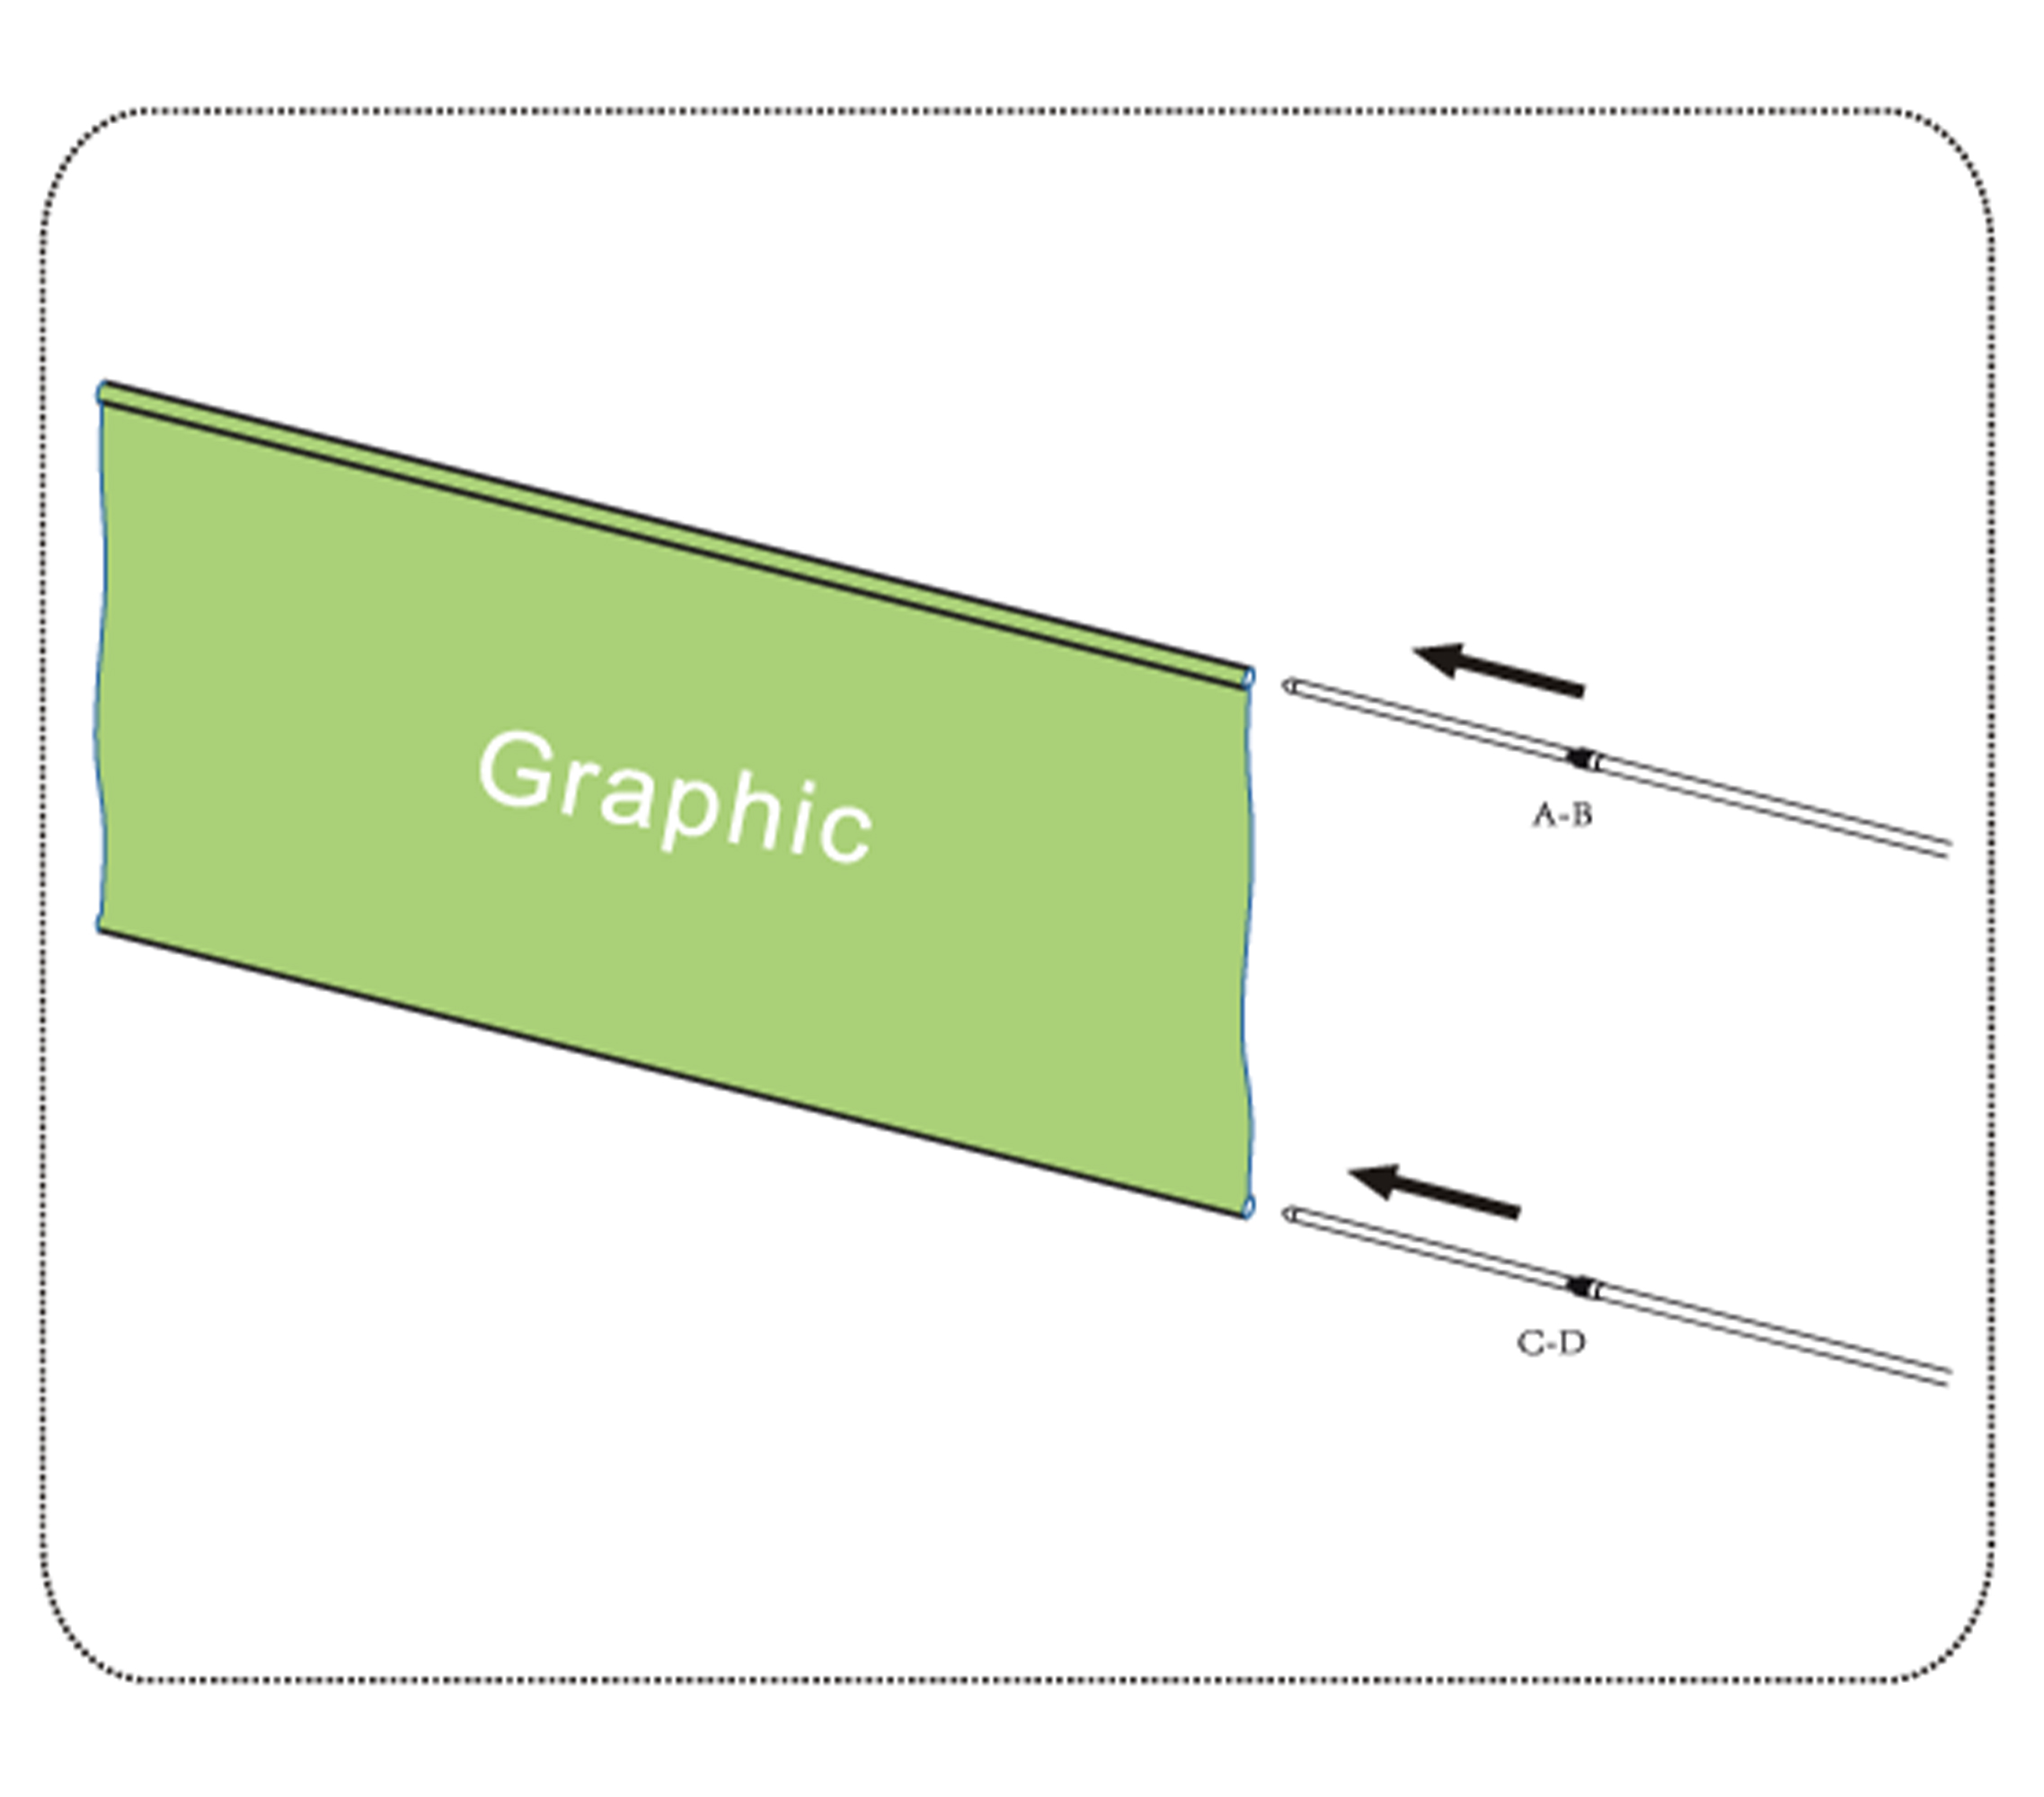
Step 3: Run poles #A-B and #C-D through the pole pockets on the top and bottom of the graphic.
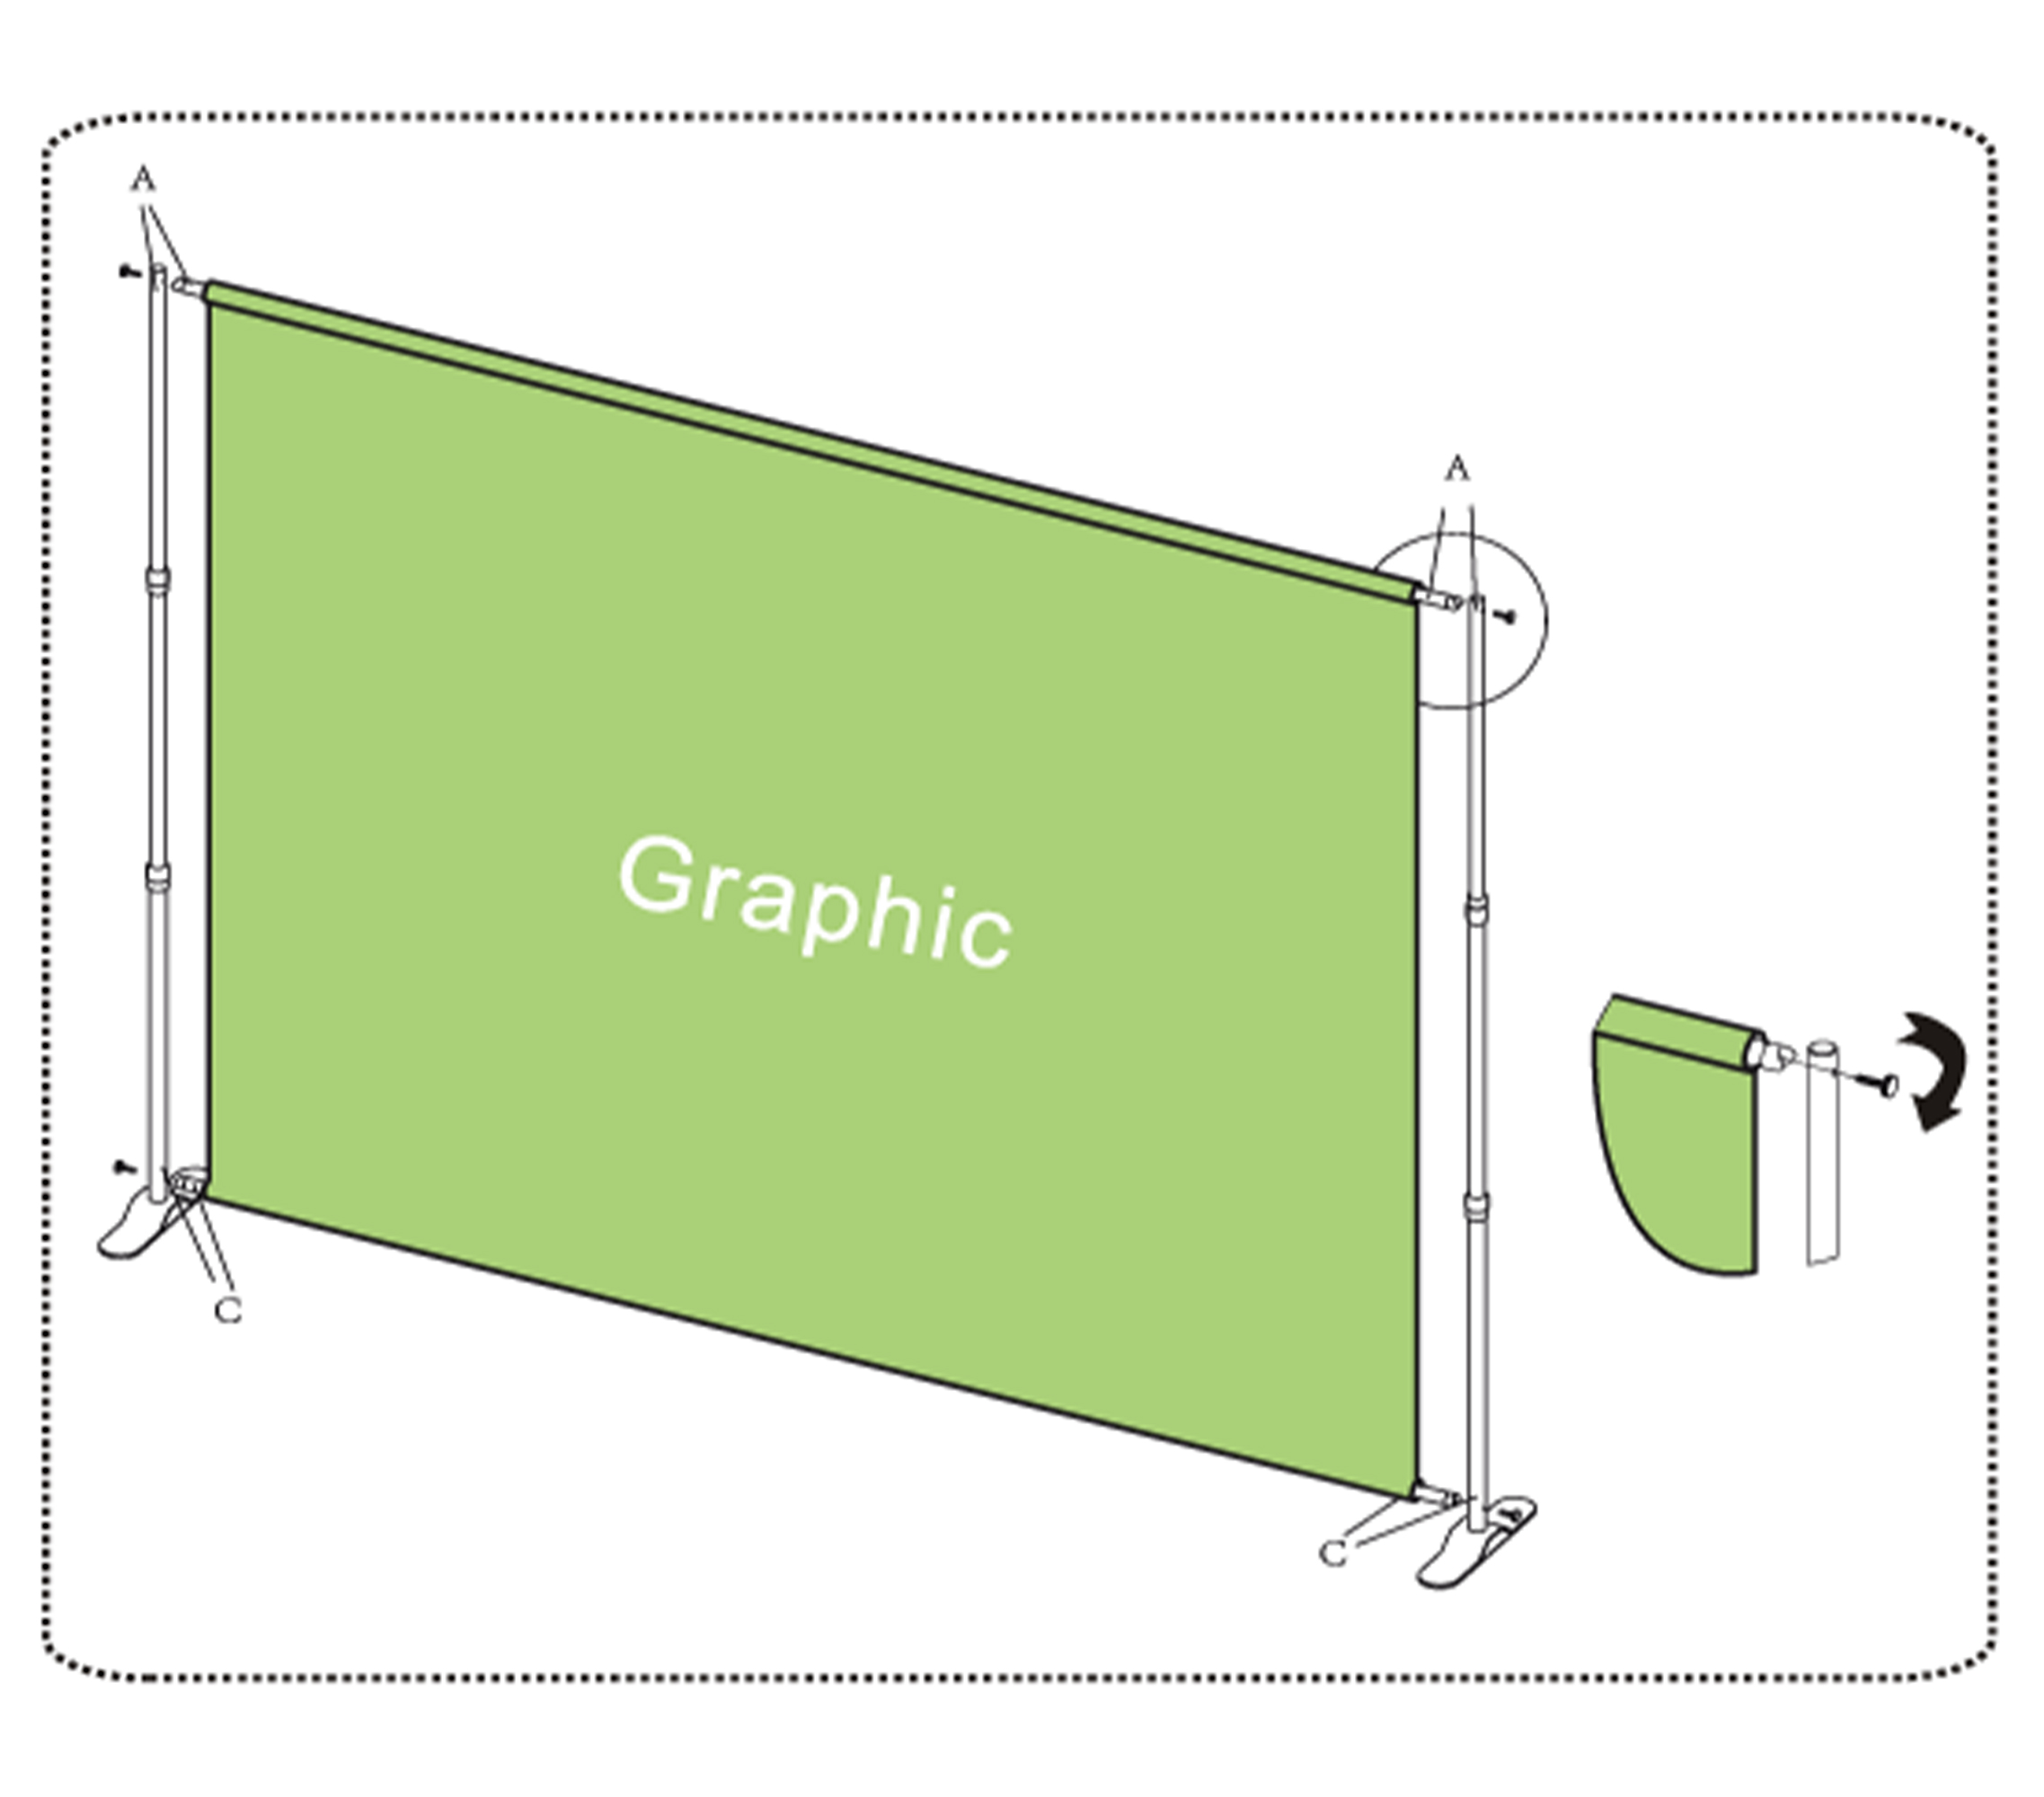
Step 4: Use the black handled thumb screws to secure the horizontal poles to the vertical poles.

Table Top Banner Stand
78.00$

X-Stand
45.00$

SD Retractable
90.00$

Deluxe Retractable
99.00$

Standard Retractable
65.00$

Tension Fabric Stand
125.00$


